Note: All instructions below are based on Windows.
Environment
Install Hexo and Initailization
Install with the command below.
1 | npm install -g hexo-cli |
After installing Hexo, let’s initialize it.
1 | hexo init //Initialize Hexo in current folder |
Or create new folder with initialization.
1 | hexo init <folder> //Create new folder <folder> and initialize Hexo in it |
Blog Config
Enter the Hexo folder you just set up.
And open “_config.yml” by right click -> Edit with Notepad++ (or your own text editor).
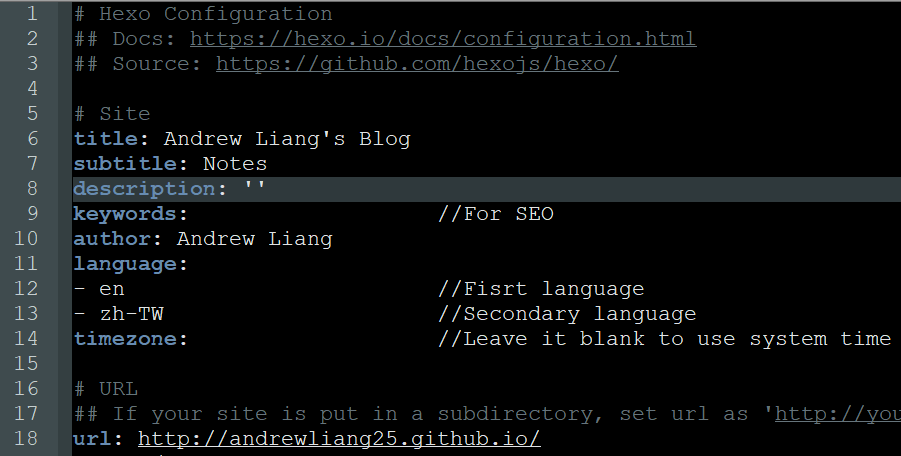
Modify line 6 ~ line 18. Change URL to your own github page https://<username>.github.to/
Deploy to GitHub
At the bottom of “_config.yml”, modify the file as below.
Change repo into your own repo link https://github.com/<username>/<username>.github.io.git

Enter the command below in terminal.
Make sure the path is blog folder.
1 | hexo clean //Clean the cache file (db.json) and generated files (public) |
Now enter https://<username>.github.io/ in browser to see how your blog looks like!
Reference
https://hexo.io/docs/index.html
https://hexo.io/docs/commands.html
https://hexo.io/docs/one-command-deployment.html