Note: Already Built GitHub Pages with Hexo
Set up access key for repo
Generate SSH keys
Open terminal and generate SSH keys by following command.
1 | ssh-keygen -f github-deploy-key |
Skip passphrase.
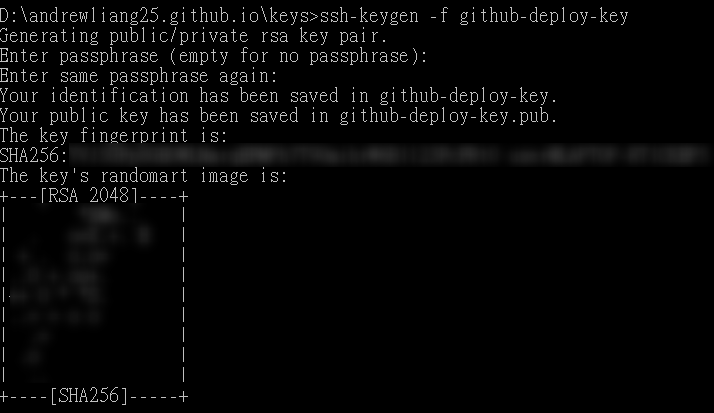
After generating, there should be 2 files.

Set up private key
blog repo → Settings → Secrets → New secret
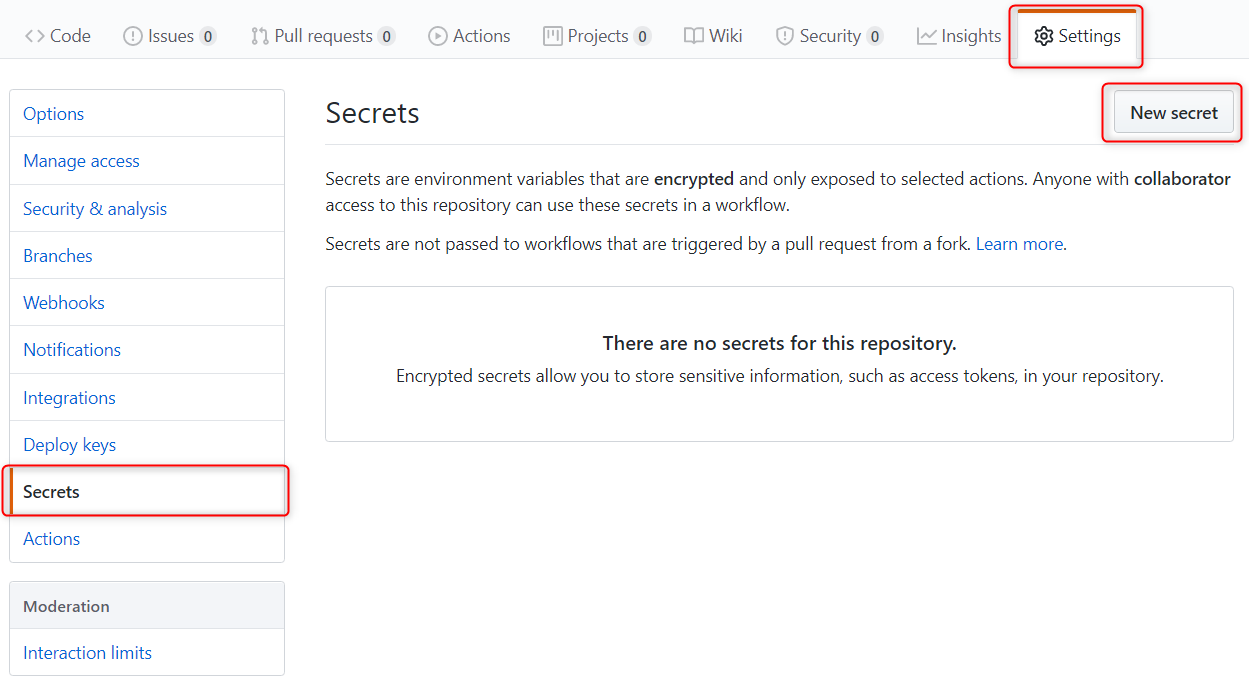
Name: HEXO_DEPLOY_PRI
Value: All content in github-deploy-key
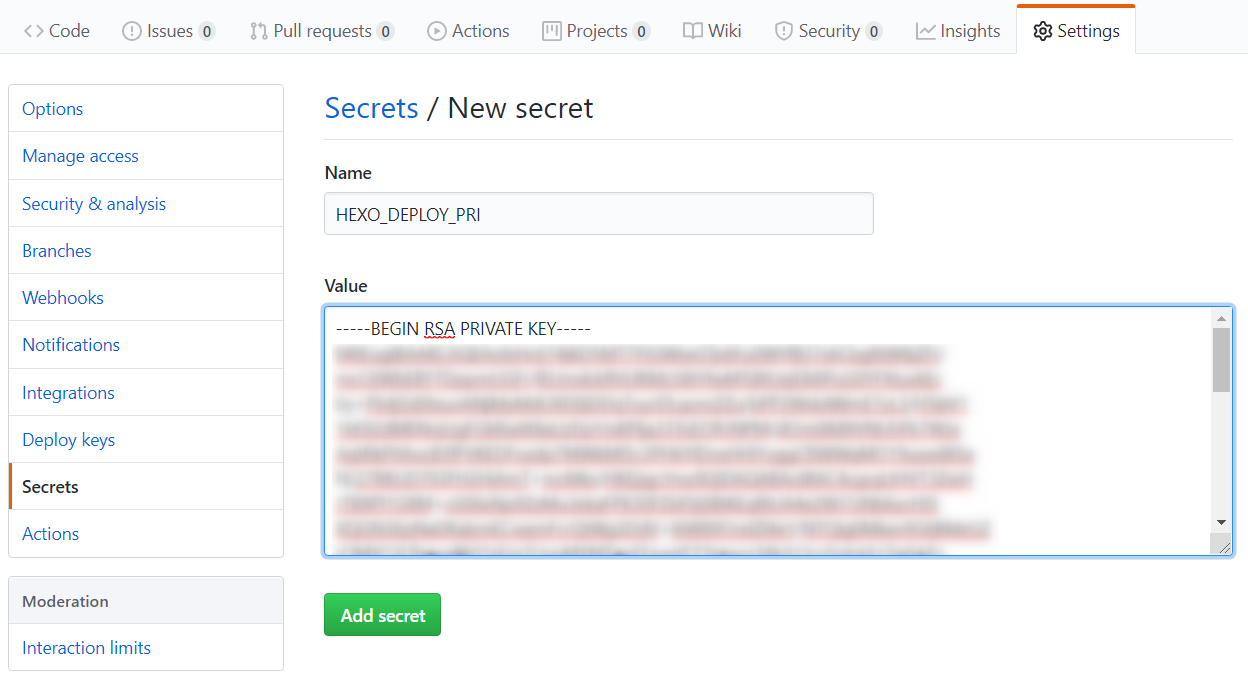
⚠ Never upload or tell anyone Private Key. ⚠
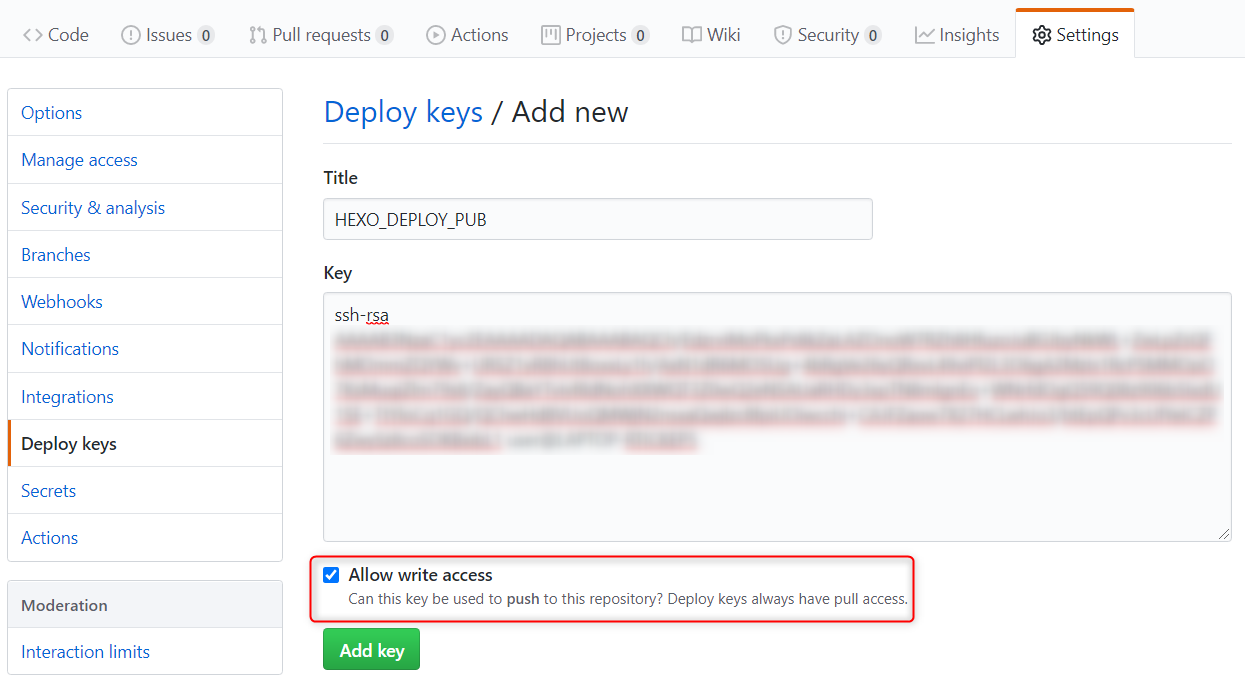
Set up public key
blog repo → Settings → Deploy keys → add deploy key
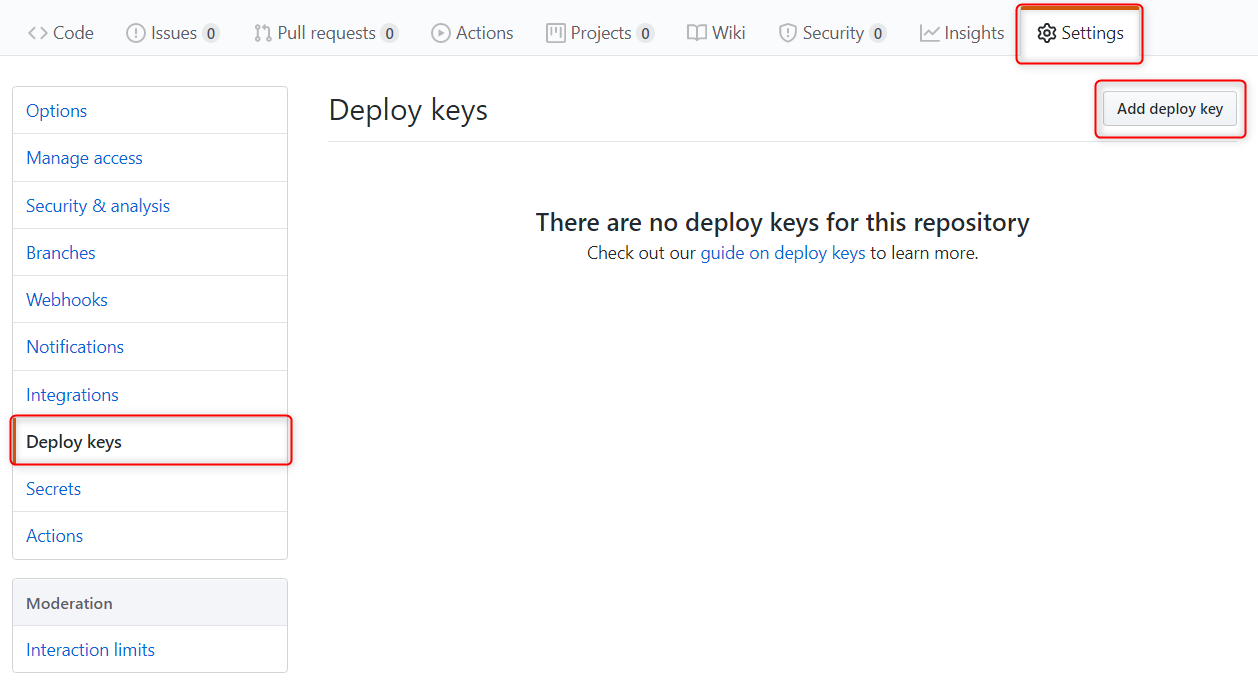
Name: HEXO_DEPLOY_PUB
Value: All content in github-deploy-key.pub
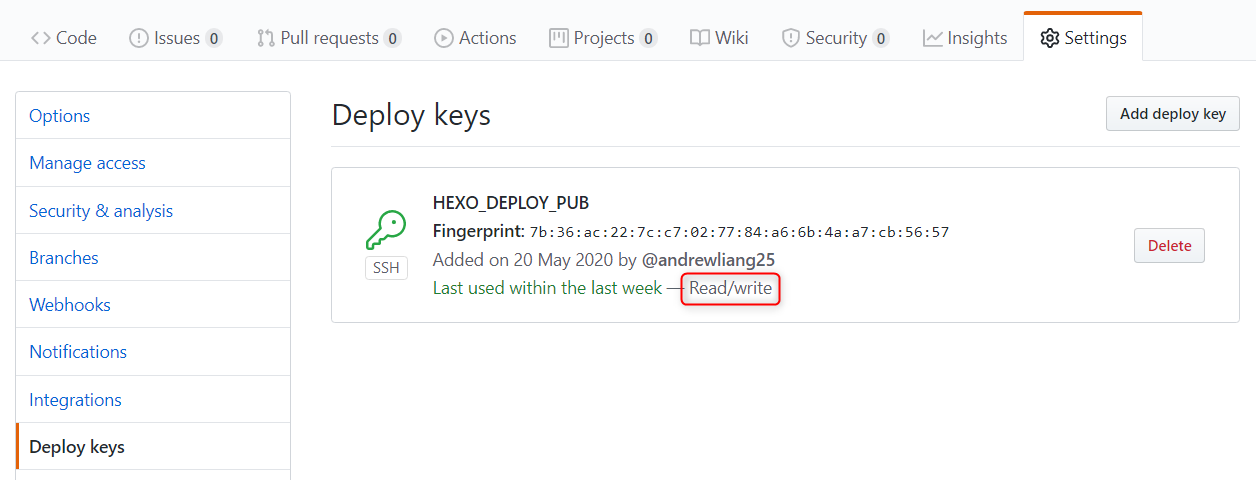
Check “Allow write access” to enable push access
Build new workflow in github action
Create a workflow
Fisrt, set source branch as default branch.
Settings -> Branches -> Select your source branch -> Update
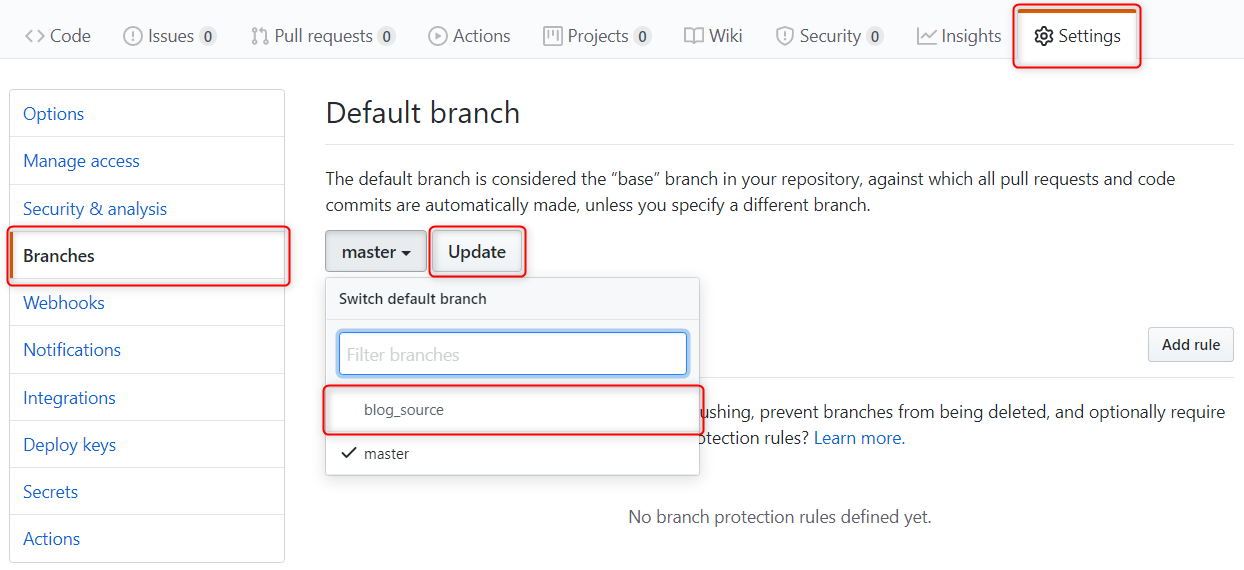
Note: the workflow file will be created under default branch.
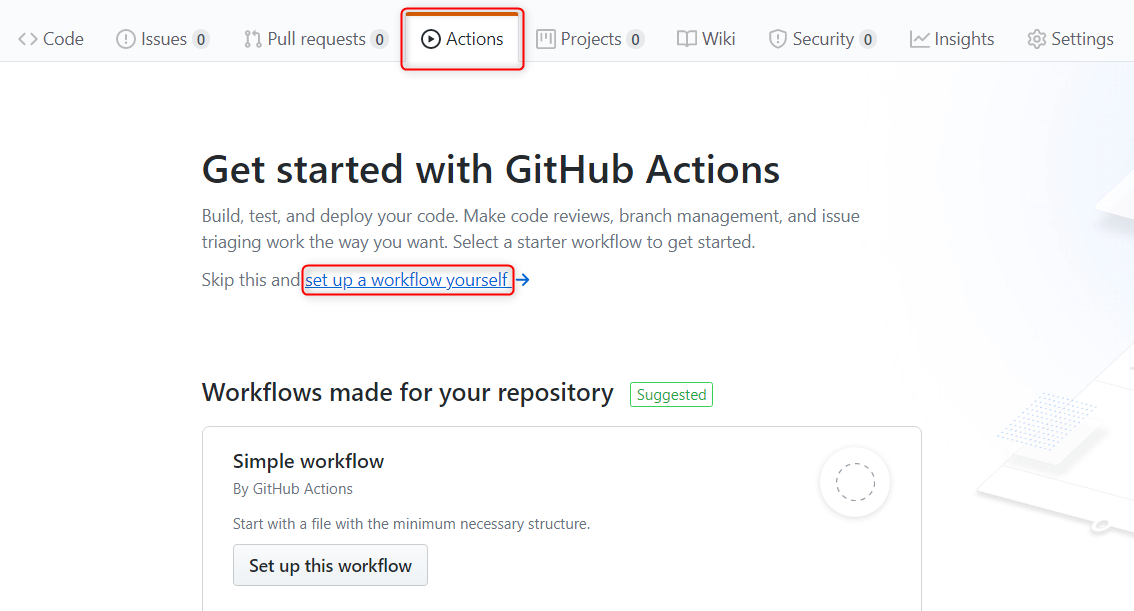
Action -> new workflow -> set up a workflow yourself
Modify main.yml and commit
Replace “blog_source_branch”, “username”, “username@email.address“ with your own info.
1 | name: HEXO CI |
Note: Hexo CI creates a Virtual Machine and deploy website for you.
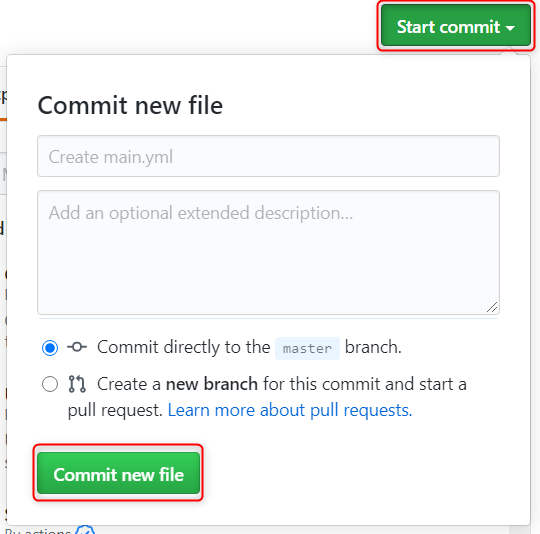
Commit main.yml into default branch.
Config Hexo deploy
Open “_config.yml” on local.
Change git repositary from http form to ssh form.
Deploy branch should be “master”.

Known Issues
CI does not tiggered after push
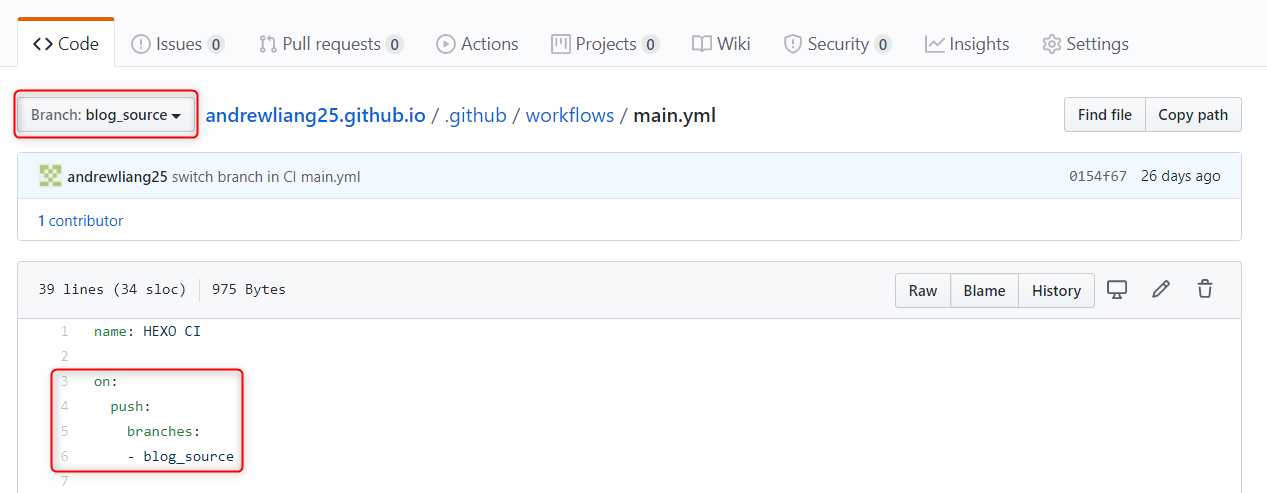
- Check if source branch is set as trigger branch in main.yml
- Check if .github/workflows/main.yml locates under source branch
CI deploy hexo failed with no access
- Make sure keys are entered correctly
- Allow write access on Public Key
Deploy hexo failed with TypeError: line.matchAll is not a function
- Using node.js version above 12.0

Reference
https://help.github.com/en/actions
https://confluence.atlassian.com/bitbucketserver/creating-ssh-keys-776639788.html
https://op30132.github.io/2020/02/05/github-action/